Building instructions for the dry separation toilet by Kildwick
What is the "Easy Loo"?
The "Easy Loo" is a dry separation toilet from the Kildwick company that you can assemble yourself. It consists of a simple wooden box with a lid on top, in which a toilet seat and a so-called separation insert are incorporated. This prevents urine and faeces from mixing after going to the toilet, thus avoiding the usual decomposition and putrefaction processes that normally cause the stench. The urine tank is then hermetically sealed and the water is removed from the faeces by adding litter or sawdust. This prevents unpleasant odours from escaping, making the Easy Loo a clean and pleasant alternative to conventional water and chemical toilets. You can find out more about what a dry separation toilet is and what its advantages and disadvantages are in another article. This article is primarily about how to set up the Easy Loo from Kildwick correctly and what you need to bear in mind.
Building a dry separation toilet yourself
With the Easy Loo toilet kit, assembling the dry separation toilet is very easy and quick. That's probably why it's not called "Difficult Loo". We show you step-by-step instructions here in our new tutorial video. You can also read about each individual step here in the description text.
The building material
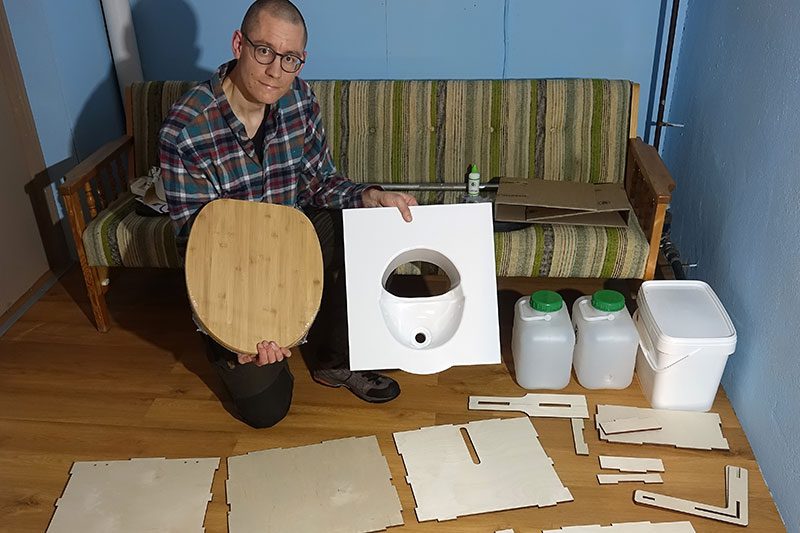
The following materials are included in the scope of delivery of the Easy Loo dry separation toilet:
- 6 wooden plates for the toilet box

The dry separation toilet kit.

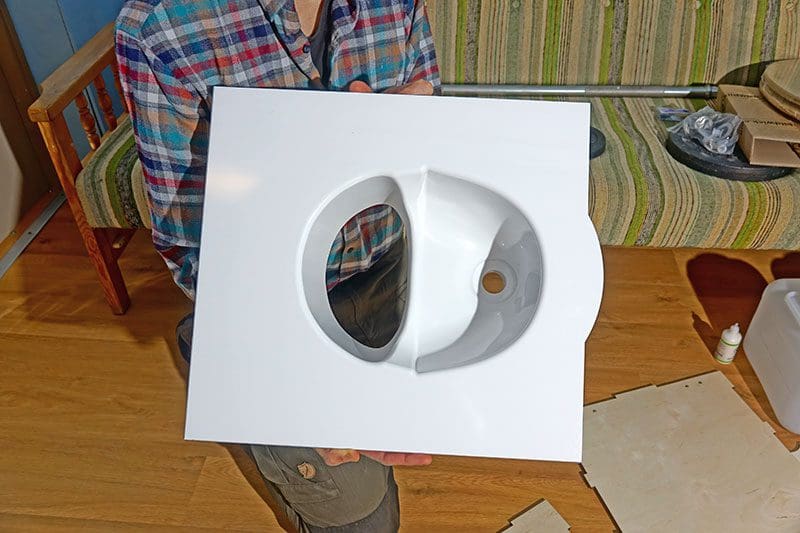
The Kildwick Separation Insert.
- 1 wooden panel as lid with built-in divider and pre-assembled hinges
- a toilet seat with bolting material
- a bucket for the droppings
- two urine tanksSpacers, made of wood, which also have to be assembled and which later hold
- the tanks in the toilet in the right place.
- two wooden assembly aids
- a tube of wood glue
- some screws and nails
- a small Allen key

We would also recommend the "Kildwick Spillguard Kit", as this is the only way to seal the urine tank airtight and watertight, even when it is in the toilet. (Of course, if you take it out, you can always just screw the normal lid on top).
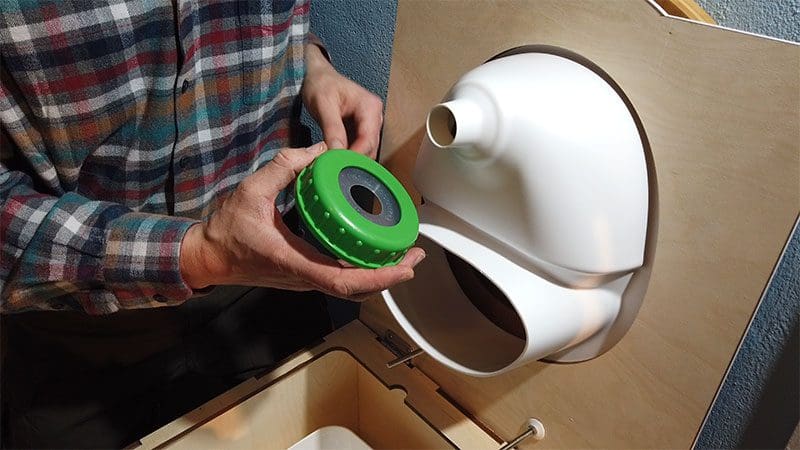
The sealing attachment for the urine tank.
This kit contains:
- a screw cap with sealing insert
- a rubber stopper to close the urine opening in the separating insert.
In addition to the material provided, you only need the following:
- A hammer
- a drill or a cordless drill
- Drill bit with thickness 6
You can find all Kildwick products here: www.kildwick.com
If you still need a cordless screwdriver, a hammer or a suitable drill, we can recommend the following products:
The assembly of the box
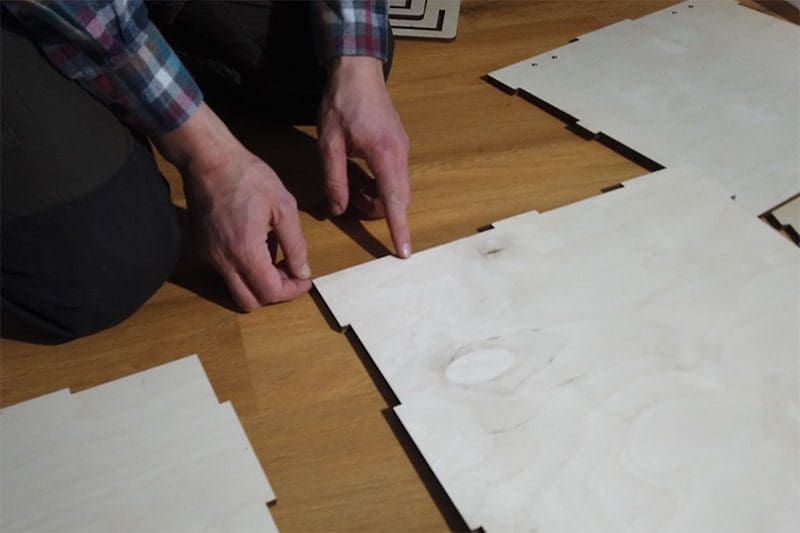
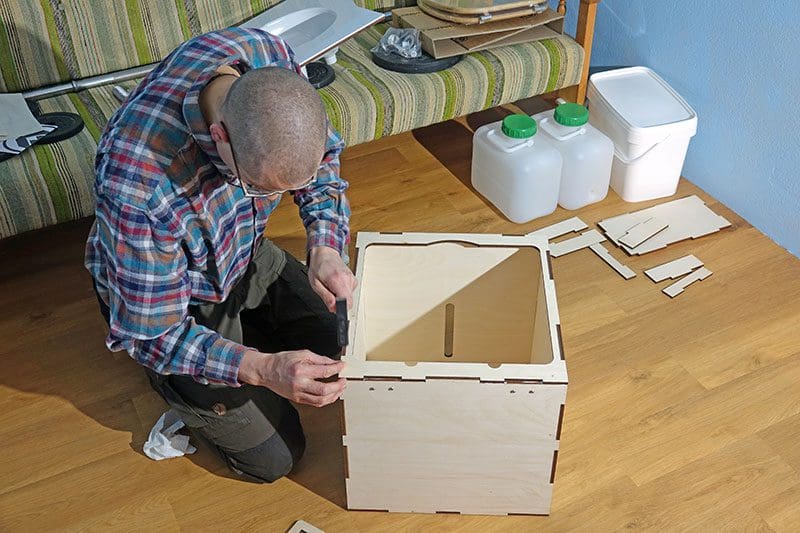
The first thing to do is to assemble the toilet box. For this you need the nails, a hammer, the wood glue and of course the wooden boards. These have recesses on all four sides so that you can put them into each other, similar to a 3D puzzle. The ingenious thing is that, just like a puzzle, only the pieces that belong together fit together. This means you can't make the slightest mistake.
The complete Easy Loo dry separation toilet kit from Kildwick at a glance.
Nailing and gluing
To ensure that the box holds together in the end and doesn't collapse under your butt, glue it together with wood glue and reinforce it with nails. To do this, always apply small beads of wood glue to the recessed areas of the edge and then put the matching boards together. Now you can hammer the nails into the boards with the hammer, whereby the corresponding nail holes are already pre-drilled, so that you can't do anything wrong here either. If some of the wood glue oozes out of the sides, you can simply wipe it away with a damp cloth.
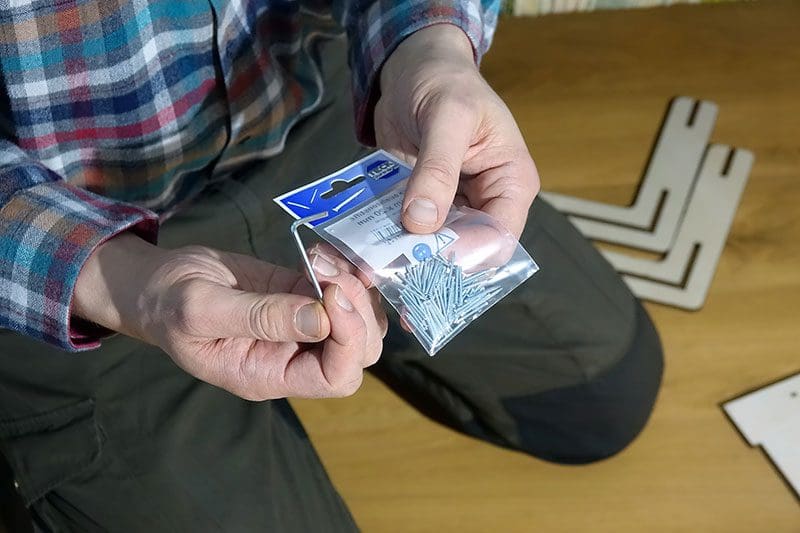
Included nails and an Allen key.

The wood glue from Kildwick.
The baseplate can be easily recognized by the outward facing corners.

Apply a thin bead of wood glue to the recessed areas.

Simply put the two panels together.

Remove excess paste with a cloth.
Using the assembly aids
Once you have joined the first two pieces together, you can attach the assembly aids on the right and left so that your construction is held at a right angle until the wood glue has dried. For this to work, however, you must start building with the base plate and the back of the box, because the puzzle principle means that the assembly aids only fit in one place.

It is best to fix the first two panels with the assembly aid.
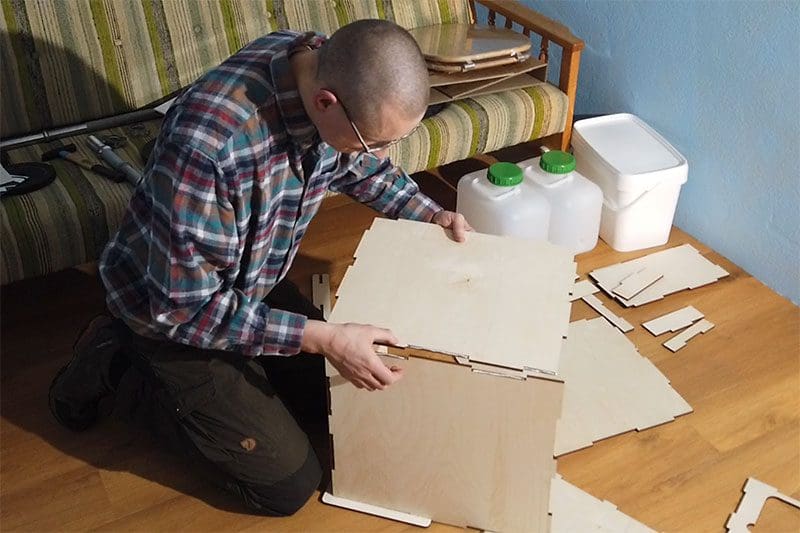
When you add the third board, it already replaces a construction aid and gives the toilet shell further stability. From this moment on, you can hammer the first nails into the construction so that it holds together, even if the glue is not yet dry. It is best to start hammering in the nails at the corner and then work your way outwards.
With each additional side that is attached, the box automatically becomes more stable, so that you can now manage without assembly aids.

Then glue in the next board again.

Then remove the top assembly aid and again spread glue into the recess.
Now insert the new plate the right way round ...

... and wipe away excess wood glue with the cloth again.
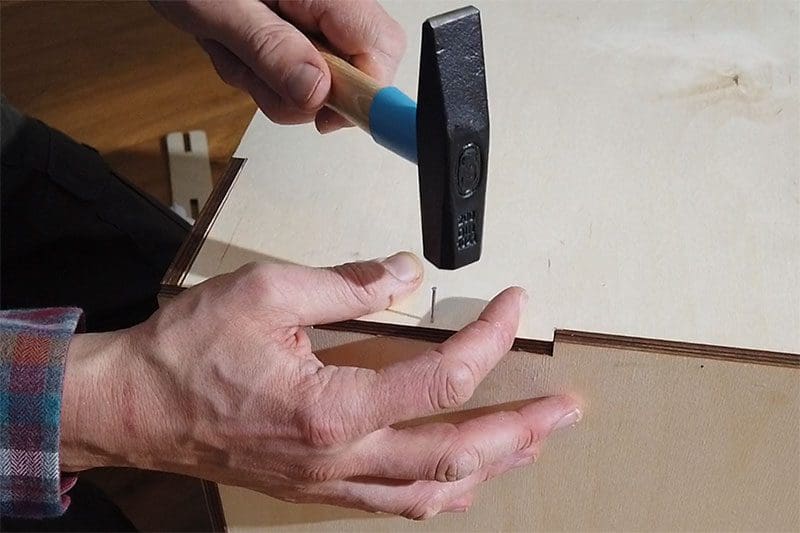
Then hammer the nails into the pre-drilled holes.
This is how you assemble the whole box, plate by plate.
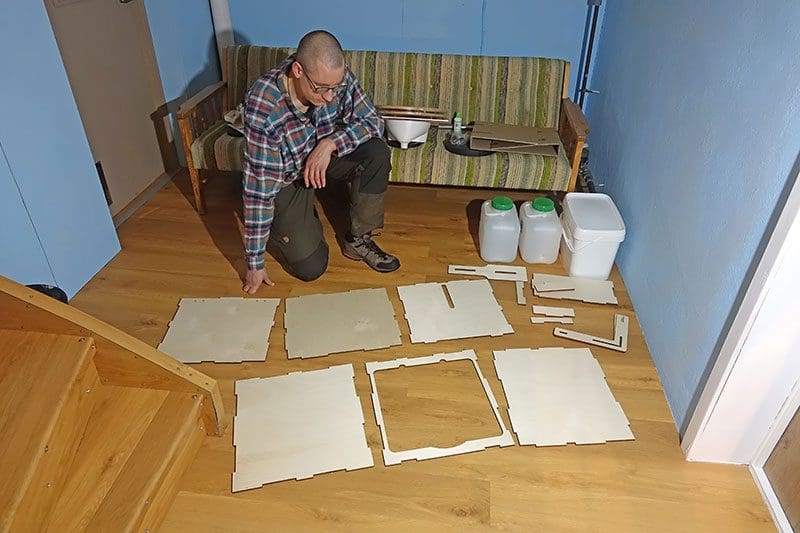
The spacers
The second step is to assemble the spacers that will later hold the containers for urine and faeces in the right place. The assembly follows the same principle as that of the outer box and again you can't do anything wrong because everything is already well-prepared.
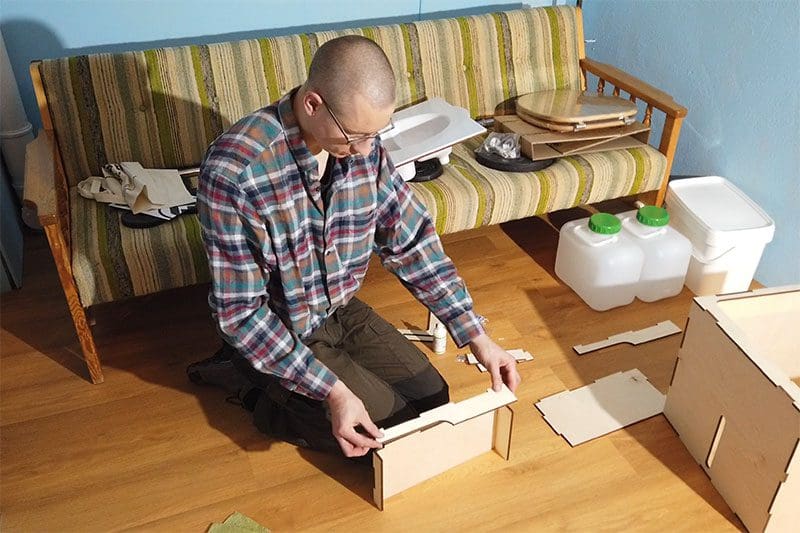
At the end, put the placeholders together according to the same principle as for the box.
The toilet seat
The next step is to mount the toilet seat on the toilet lid with the divider insert. In principle, this works just like any other toilet. In this case, you only need to drill the appropriate holes in the plastic of the divider insert beforehand. The holes are already pre-drilled in the wood underneath the insert, so you know exactly where to drill and only need to deepen the holes through the plastic.
Once the holes have been drilled, unscrew the nuts from your connecting screws and put them on the toilet seat, first from the inside outwards and then with the thread through the newly drilled holes. Hold everything firmly in place and then turn the lid over so that you can easily screw it on from below with the nuts.
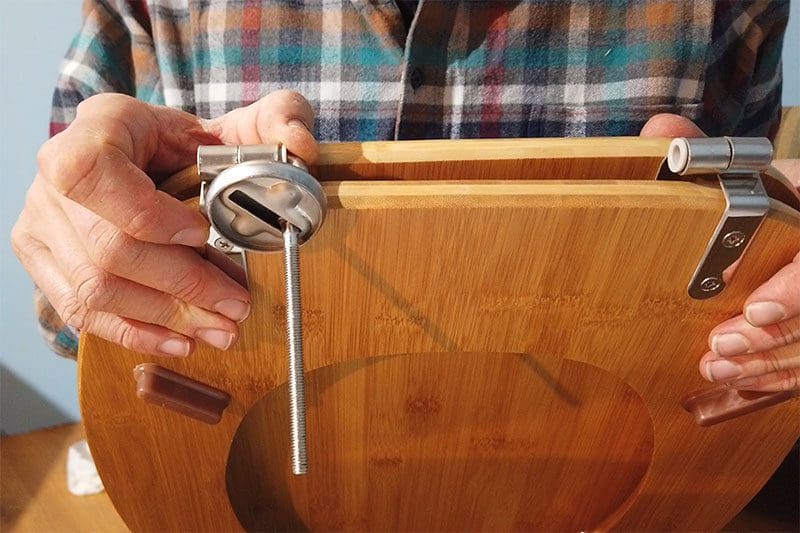
Insert the connecting screw from the inside into the joint of the toilet lid ...
... and then pushes the two screws into the freshly drilled holes.
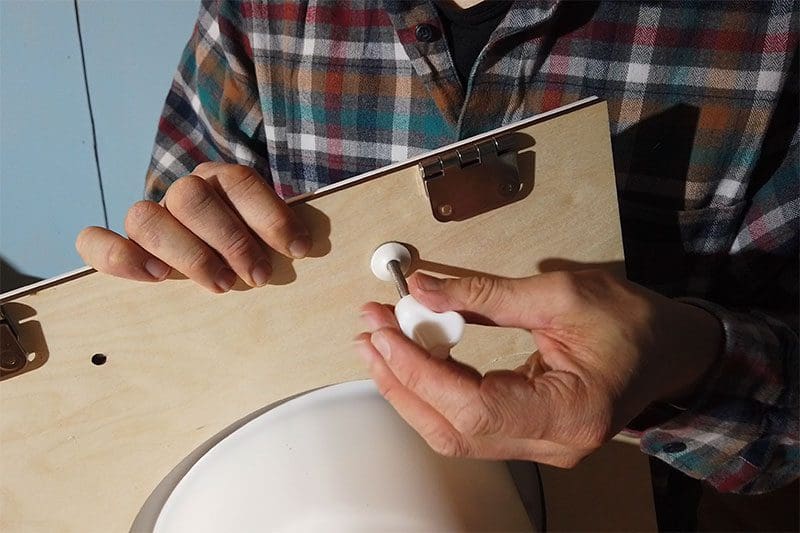
Use the small plastic screwdriver to tighten the nut that secures the toilet seat.
You can also place the lid upside down on your toilet box.
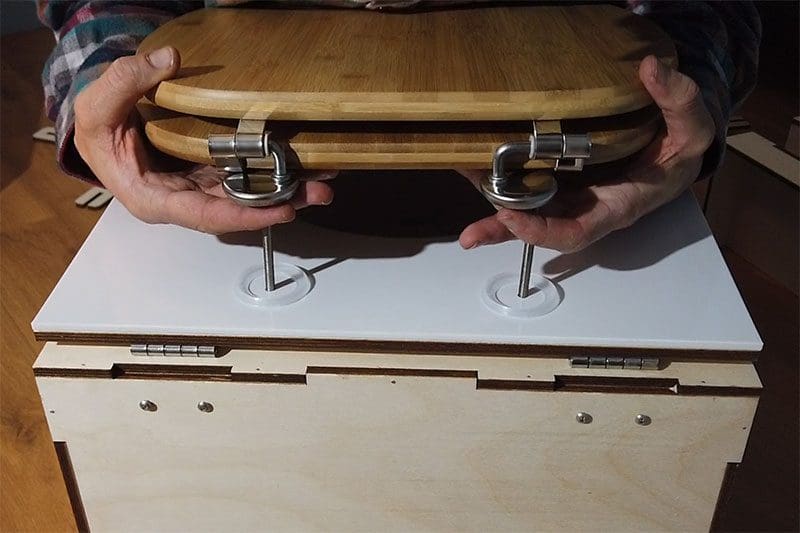
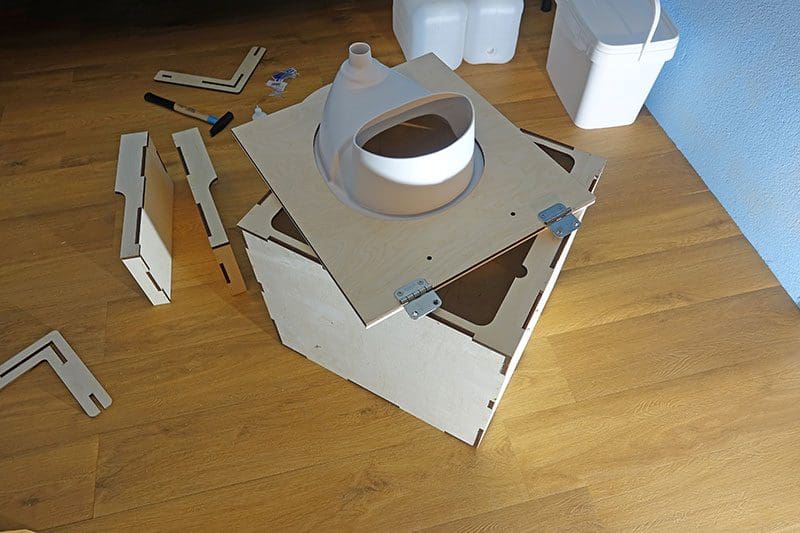
The toilet lid
On the back of the toilet box, there are already pre-assembled drive-in nuts in which the matching screws are also located on delivery. You must first unscrew them so that you can then use them to tighten the two hinges. Use the Allen key supplied to do this. Then insert the divider insert and fix the toilet lid and toilet seat on top of it with the screws.

Remove the pre-assembled screws with your Allen key.

Put the hinges in the right position and screw them tight again.
The inside
Inside the toilet, the two spacers for the collection containers must now be inserted on the left and right. When these are seated correctly, the corresponding containers are added.

The Kildwick Urine Tank
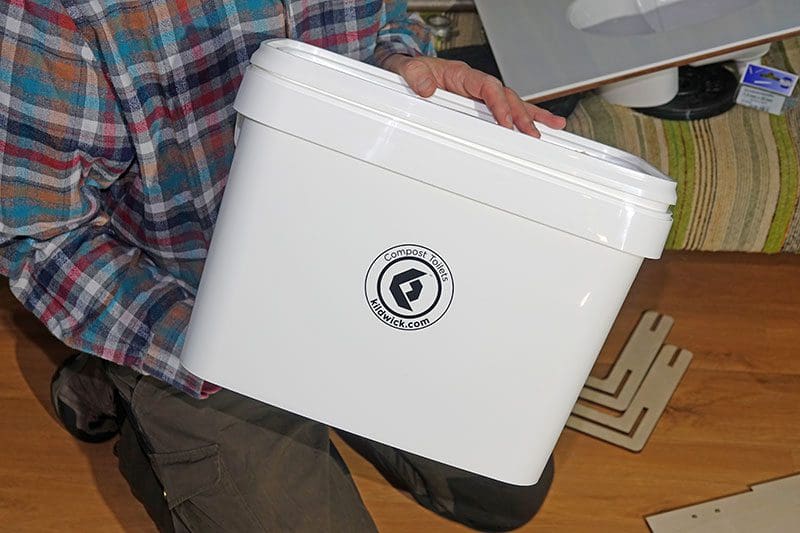
The bucket for the excrement.

Compostable bin liners are also available from Kildwick.
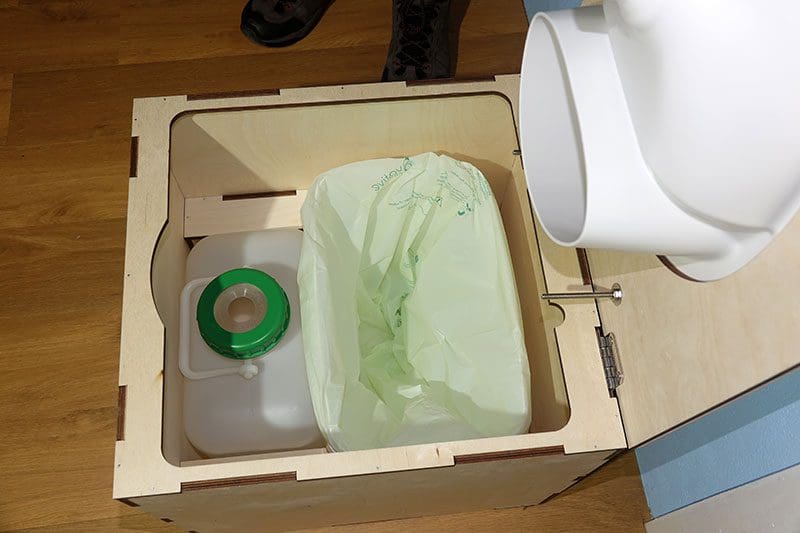
A compostable bin liner in the poop bucket ensures that the bucket itself does not get dirty.
Our tip: The Kildwick Spillguard Kit
If you have purchased a "Kildwick Spillguard Kit", you can screw the sealing cap onto the urine tank beforehand and your new dry separation toilet is ready.

When the separating insert is folded down, the urine spout closes airtight with the rubber seal.
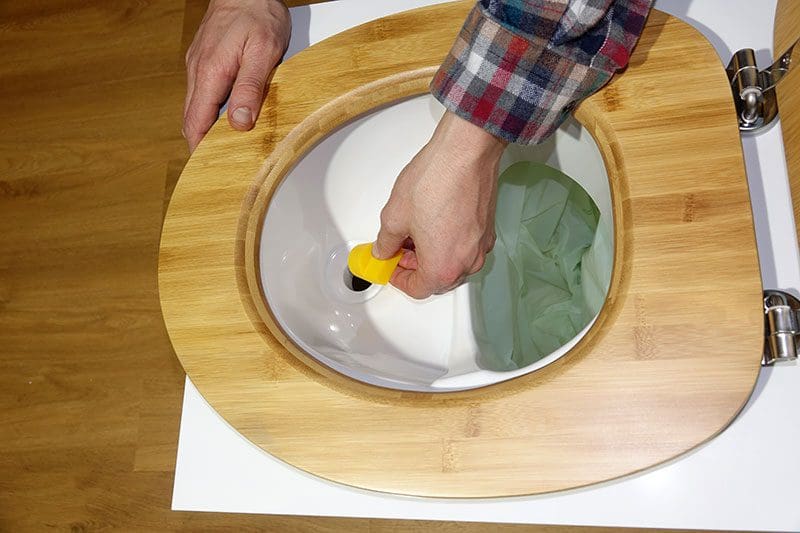
The yellow rubber stopper prevents odour from escaping from the urine tank.

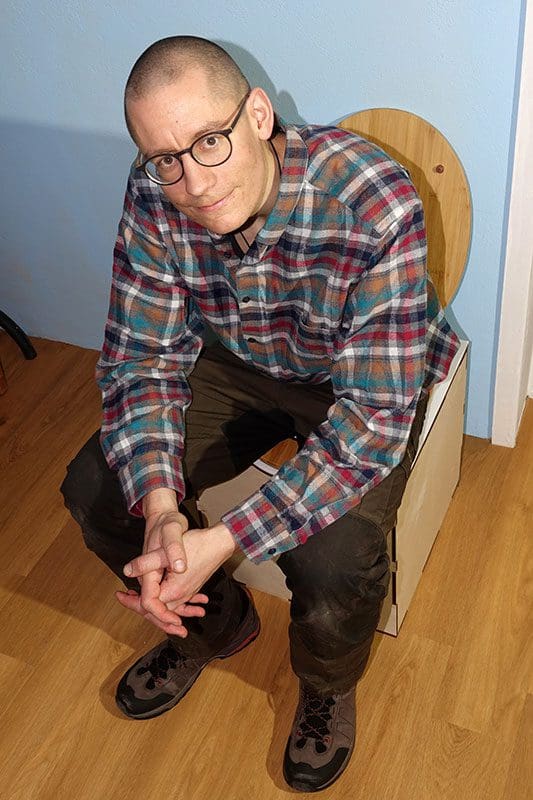
Enjoy your first session.
Use and care
To dry out the droppings so they don't stink, you need to sprinkle some litter or sawdust on them after each big deal. These are available in large packets from Kildwick. Alternatively, you can just use small animal litter or ask a sawmill for sawdust.
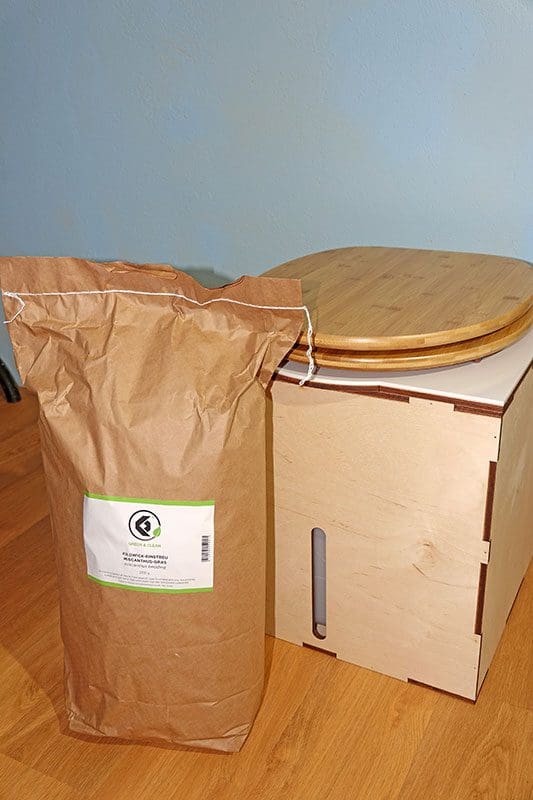
Litter or sawdust dries out the droppings.
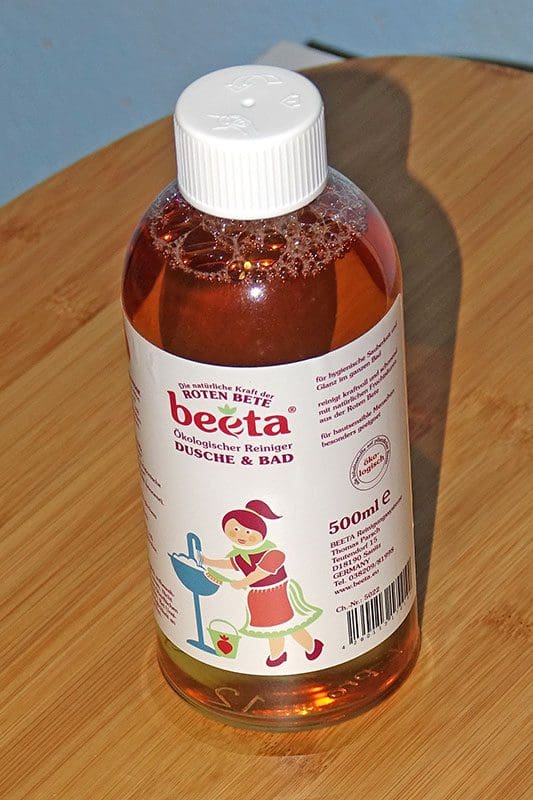
The biodegradable cleaner from Kildwick.
To clean the toilet, you should use a natural and biodegradable cleaner. Kildwick also has this in its range.
We hope you have fun using your new dry separation toilet and that our building instructions have helped you. Of course, we are always happy to receive comments with further tips or your own experiences.